|
|
|
|
| HOME & GARDEN ARTICLES |
Four Ways to Liven Up a Boxy Room
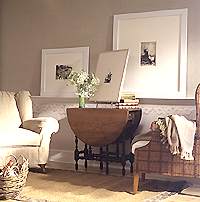
Crowning Glory?
Decorating experts all say to make the most of the focal points of your rooms. But what if your plain, boxy room has no built-in interest? Here's how to create four focal points yourself.A scrolled wallpaper border and crown molding create a picture rail that adds instant architecture to a boxy beige room. Pictures that might otherwise be lost grab attention when they are matted and framed in a big way, then stacked along the picture rail.
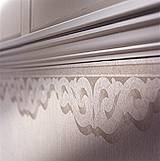
Crown molding and wallpaper borders add architectural character. But hung at the ceiling, they can be overlooked. Draw the eye to a more visible height using the same materials—lumber-store molding and a decorative border. Mark the position for the molding's upper edge—below chair tops and above tabletops—with a level and hard lead pencil. Cut small wooden blocks to wedge between angled molding and wall. Screw blocks to wall studs and nail molding to blocks. Cut and nail a 1x4 plank to slightly protrude on top of molding. Paste wallpaper border below molding.
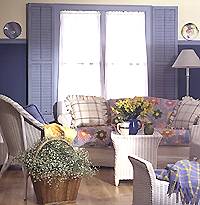
Open and Shut Case
Standard exterior shutters and a few painting tricks give a pair of small sash windows the power of a picture window. Since the shutters aren't operable, no complicated carpentry skills are involved.
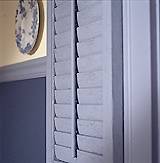
Exterior shutters can perform the same function inside as out: They extend the line of a window, making it appear larger and more impressive than it is. Another exterior trick, painting window moldings lighter than siding, expands the window area even more. Paint the lower portion of the interior wall in dark contrast to the window molding. Add a plate rail or wallpaper border that matches the molding. Trim wooden exterior shutters to fit the length of the windows. (Since they won't be closed, the shutters don't need to be as wide as the window.) Attach shutters to the wall with picture hangers or, if the depth of your window frame allows, attach shutters with 3/4-inch hinges. Paint woodwork and shutters to match window molding.
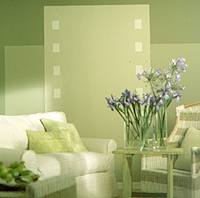
Set the Stage
Sticking to a single paint-store color strip makes picking shades as easy as 1, 2, 3: The colors automatically blend. Be sure there's enough contrast, though. If in doubt, move down one shade on the paint strip.
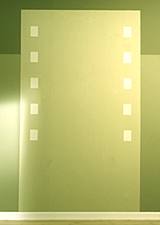
Television crews create backdrops that enhance a scene. Do the same to create a conversation corner for your room. Choose four colors from a single paint-store sample strip. Paint the entire wall the darkest color. Then, using a tape measure and a straightedge, block out a geometric pattern. Blocks should be larger than the room's architectural elements, such as doors and windows. Make the horizontal rectangle large enough to span adjacent furniture (ours is 5x9 feet). Draw a smaller vertical rectangle (ours is 7x5 feet). Tape off the first rectangle and paint it in the third lightest color. Tape off the second rectangle and paint it in the second lightest color. Paint the small, light-colored rectangles last.

Quilt Art
Clip-style rings and a sturdy metal drapery rod display a patchwork quilt as the center of attention in this cozy country room. The small scale of the rod and clips helps them disappear into the design of the quilt.

Dig quilts or rugs out of the closet and give them top billing—on the wall. Rather than centering a textile on the wall, hang it much as you would a painting or print, with the center of the work just below eye level. (You may need to make adjustments for large quilts, lowering them even further so they aren't too close to the ceiling.) With tape, mark where the upper edge of the quilt will fall on the wall. Allow space for curtain rings, then mark the rod's placement. (If you live in an old house, you may need to adjust the placement slightly to compensate for an uneven ceiling or floor; just make sure the overall effect is balanced.) Hang the rod, rings, and quilt.
|
|
|